Advanced mode allows you to create a complex importing logic. Many brokers and data sources provide data that doesn't directly match transactions. This may involve adjusting logic based on the action type, referencing other rows or sheets, or tracking traits in a shared variable. This flexibility is achievable through programmable presets.
When creating a fresh preset, we'll help you setup the basics. At any time you can switch to Advanced mode to access the functionality described here.
Learn by example
You can check how every built-in preset is build and modify it. Just edit the chosen preset and switch to Advanced Mode.
You can also copy & paste blocks between presets.
Please, read the article on the basics first.
And now let's go through the various statements available in imports.
Adding transactions
Every added transaction requires at least the Date, Transaction type and Asset. Buy & Sell transaction will also require Price and Quantity, while Income & Other transactions will expect Value.
Once the first transaction is created, it will be displayed in the dedicated transactions tab.
Adding accounts
Every added account requires at least a Name.
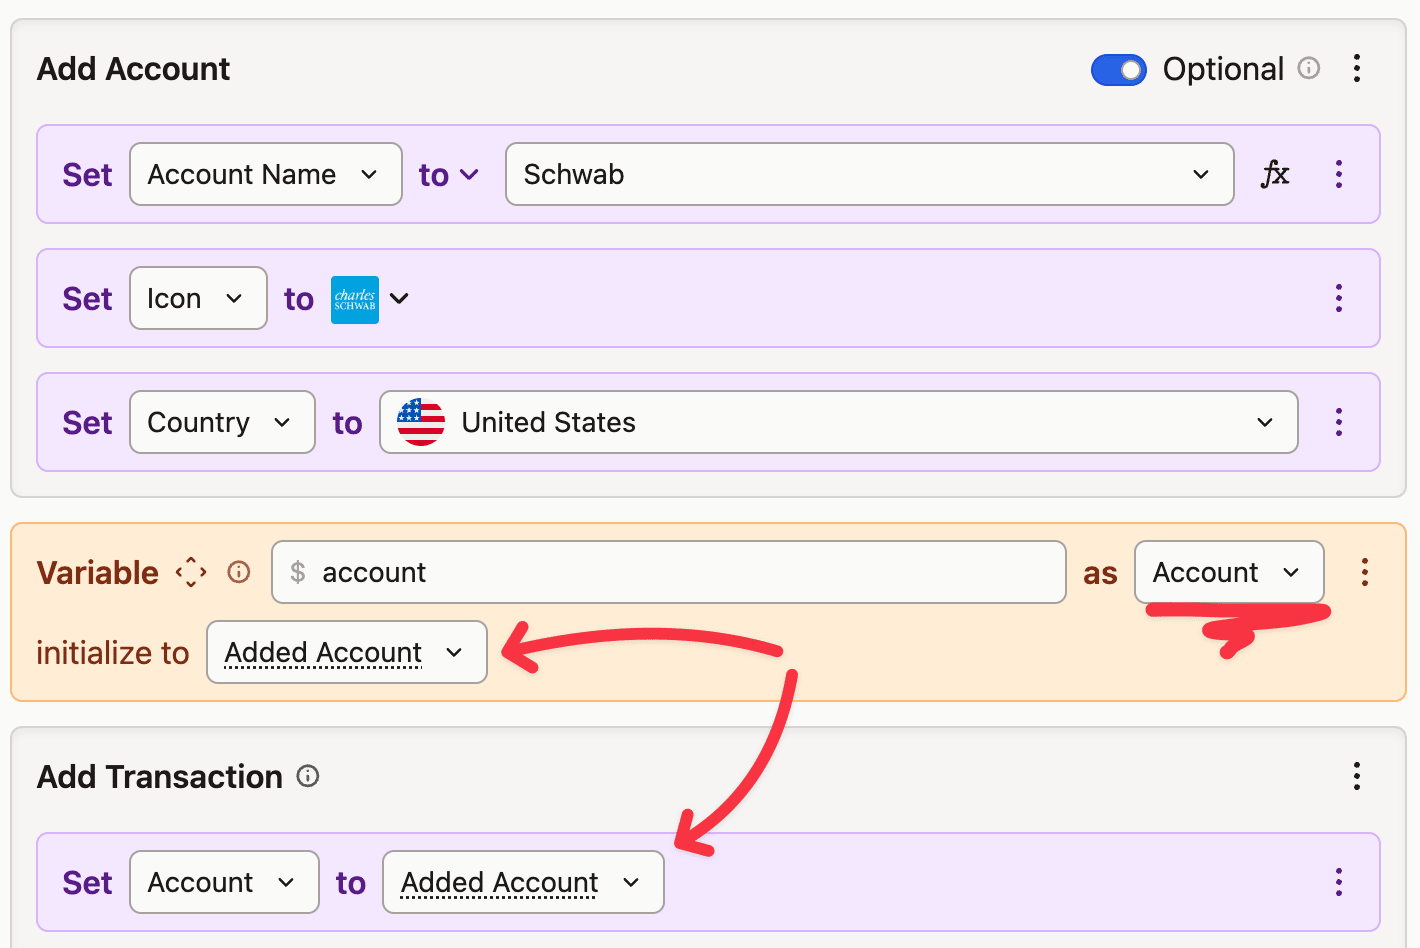
Account can be made optional, which means that they won't be added unless they are referenced by any of the transactions.
Once the first account is created, it will be displayed in the dedicated accounts tab. Please remember that optional accounts won't be displayed there unless a transaction uses them.
To use such an account you use the special Added Account property, which you can assign both the variables and properties.
 Account can be assigned both to a variable or any property
Adding assets
Every added asset requires at least a Name, Type and Currency. It's always a good idea to set the Symbol as well, which can be later used to find the asset.
You can use the Market Data Source property to use any existing market symbol as the source of the market prices.
Asset can be made optional, which means that they won't be added unless they are referenced by any of the transactions.
Once the first asset is created, it will be displayed in the dedicated assets tab. Please remember that optional assets won't be displayed there unless a transaction uses them.
To use such an asset you use the special Added Asset property, which you can assign both the variables and properties.
Fetching market asset's taxonomies
If you create a duplicate of a market symbol - like a derivative or option - you might want to fetch the underlying symbol's taxonomies (Sector, Region & Category).
You do that by adding the Update Asset Taxonomies statement after you've set the Asset's ISIN or Market Data Source.
Setting market prices
The Set Market Price statement lets you set the price for a specified asset at a specified date.
The asset must be created before this statement is called. So you cannot add it to Add asset, but you can use it as a statement right after it.

To set the current time, you can use the `Date.now()` formula
Looking up data in other rows or sheets
Some more complex presets might require looking up other rows - for example, to collect fees or to check the existence of another transaction.
You can specify where to start the lookup, which way to go, how many rows to skip and when to stop.
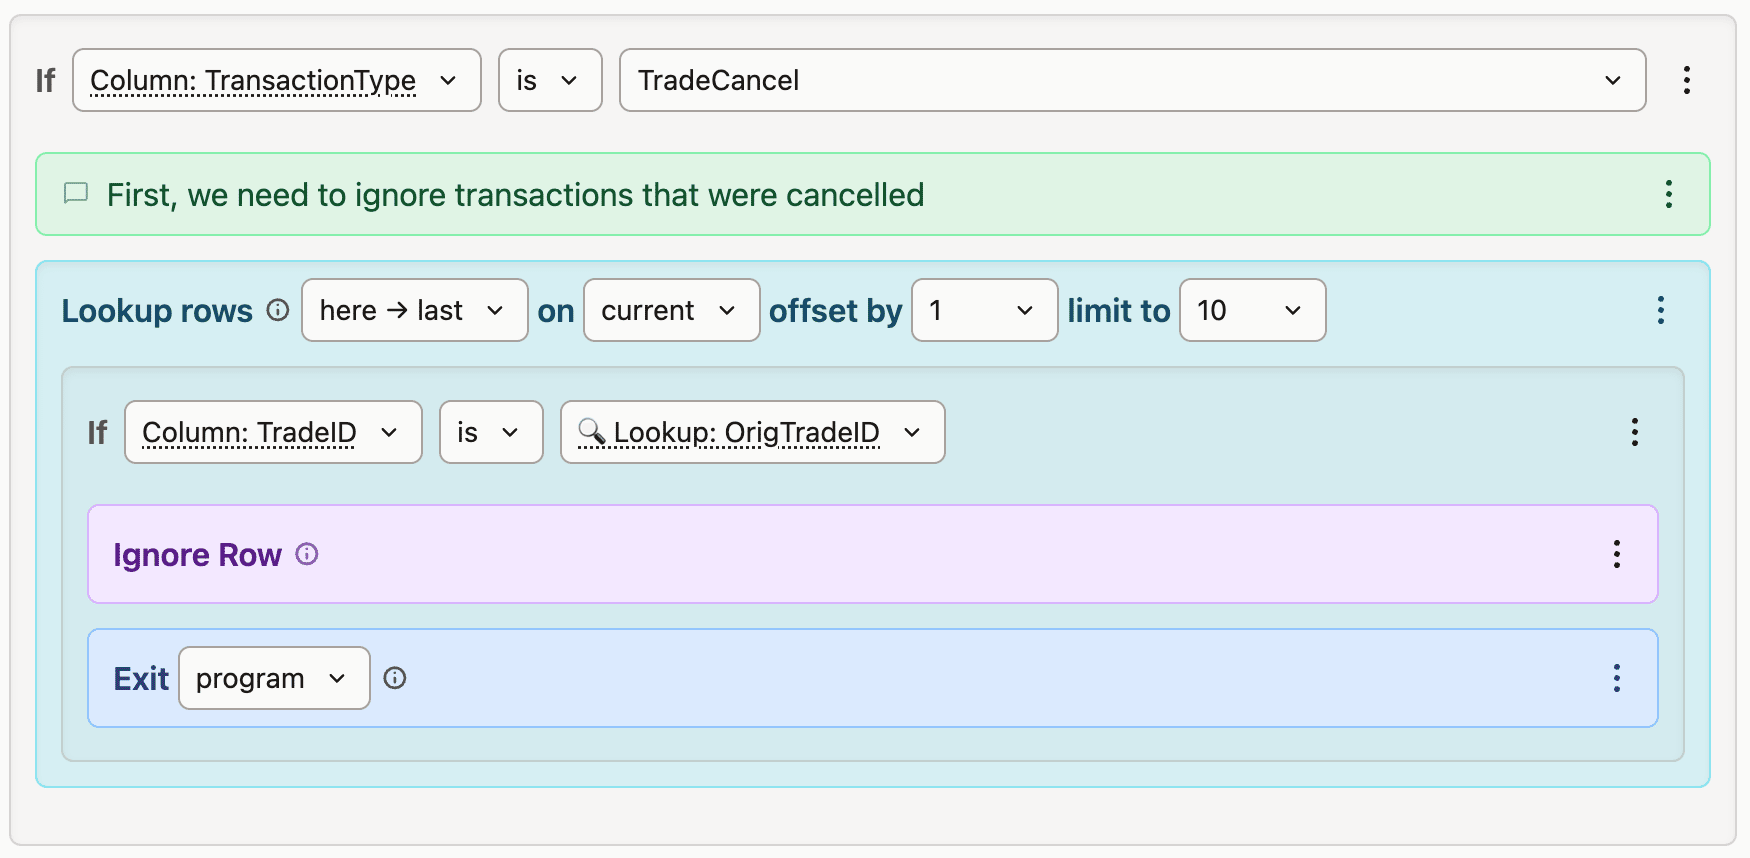
For each row within the lookup it's contents are executed. The parent row's columns are still available under Column: * as usual, while lookup row's columns are available under 🔍 Lookup: * name.
You can stop the lookup with the Exit statement. You can choose there to exit the whole program and proceed to the next data row, or to exit just 1 level up which will stop the lookup.
 If the transaction type is "TradeCancel", we lookup the following rows and ignore the ones have the same trade id
Ignoring rows
You can ignore rows with the Ignore Row statement. Once you do that, the row will not participate in any lookups and won't be executed within the main loop.
Ignoring rows within the lookup ignores the look up row, not the parent one.
This is a very handy feature to mark the rows as being already handled.
Adding notes to rows
At any point, you can add a note to a row. They will be displayed in the output table next to a row that was evaluated.
Multiple data sections
Some files contain more than one type of items. For example, as single file can contain both accounts, assets and transactions.
You can add as many sections as you need on the Data Source page. They may refer to the same or different part of the file, have its own set of columns and their own programs.
Some sections may be optional, which means that if they cannot be found, the preset will still work.
You can treat different sections like sheets in the Excel file. They can produce objects or only be used to lookup rows, as you do it across different sections.