Step 1: Find the import preset for your broker
Capitally provides you with a variety of in-built import presets for common brokers and apps.
If your specific broker isn't listed, don't worry. You can easily create a custom template yourself – or you can send us a sample CSV/XLS/JSON/XML file at support@mycapitally.com. Include as many transaction types as possible, randomize your actual number, and provide us with a brief description of how to export the data from your broker.
Step 2: Export Transactions From Your Broker
Next, export your transactions from your broker as per the instructions provided. After exporting, all you have to do is drag and drop the file into Capitally or open it directly.
Your data does not leave your device
It's worth noting, that whatever file you drop on Capitally it will always be handled locally. It doesn't have to be sent to our servers or elsewhere. Plus the transactions that you decide to import out of it will be encrypted.
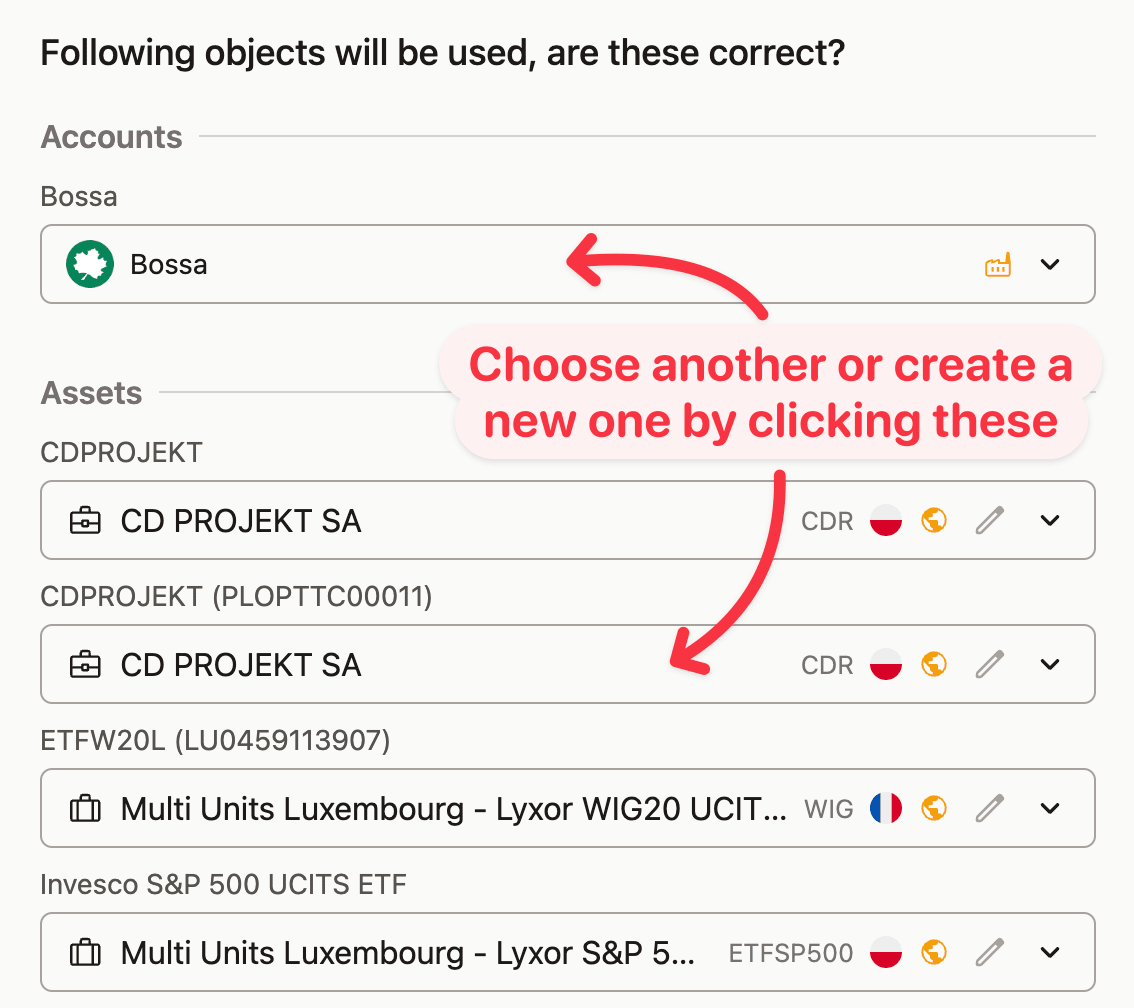
Step 3: Match Your Assets
Once you've imported the file, Capitally will start matching the data to the existing assets in your project or find them on the market. Whenever an asset is encountered for the first time, we'll ask you to confirm if the proposed assets are correct. You can manually select from other matches or search for another symbol if needed. Creating a custom asset is also an option.

Importing multiple accounts from the same broker
To import multiple accounts from the same broker, simply choose a different account in Step 3.
Don't forget, you can also make a new account from the dropdown.
Sometimes, after importing another file, the final Summary (Step 5) might load immediately. Just click ← or Review data to return to the review screen and switch the account if needed.
If you're frequently handling multiple accounts, consider duplicating the import preset so each one imports into a separate account.
Step 4: Review Imported Data
Take some time to review the data in the table.
If you don't want to import a certain transaction - just change it's Status. Some of the transactions can be already ignored - either because they're not supported, or they're already imported - you can check the reason by hovering on the info icon next to status.
You can update the status of multiple rows at once by selecting them and changing the value on any of the rows.
Additionally, the rows can be sorted by clicking on the column headers for easier review.
Step 5: Final Validation
At the last step, we'll show you the final balances of all the positions you're importing so you can verify that everything is correct. After you confirm the import, you can always undo it if you notice any issues later - either from the toast message that appears or by using the Undo option in the top-right menu.